
Configure AWS CLI
By Vladimir Mikhalev · Docker Captain · CNCF Ambassador · IBM Champion
This article is for those looking for a detailed and straightforward guide on configuring AWS CLI.
The AWS CLI is a single tool for managing AWS services. With just one tool download, you can control many AWS services from the command line and automate them with scripts.
TIPArchitecture Context
Named CLI profiles work for individual developers managing multiple AWS accounts. For teams, AWS IAM Identity Center (SSO) provides centralized credential management with temporary session tokens. Choose named profiles for personal workflows and SSO for any environment where multiple engineers share account access or where compliance requires credential rotation and audit trails.
CAUTIONUpdated October 2026
This 2022 walkthrough creates a long-lived access key for an IAM user with AdministratorAccess. For anything beyond a personal lab, use IAM Identity Center with short-lived credentials (
aws configure sso) and a least-privilege permission set instead.
IMPORTANTIn this guide, we will consider the case when you already have an operating system with AWS CLI installed on it.
For detailed instructions on installing the AWS CLI on macOS, see my guide: Install AWS CLI on macOS.
We need to create a new user and assign him an access policy. The user will be used to connect to AWS using AWS CLI.
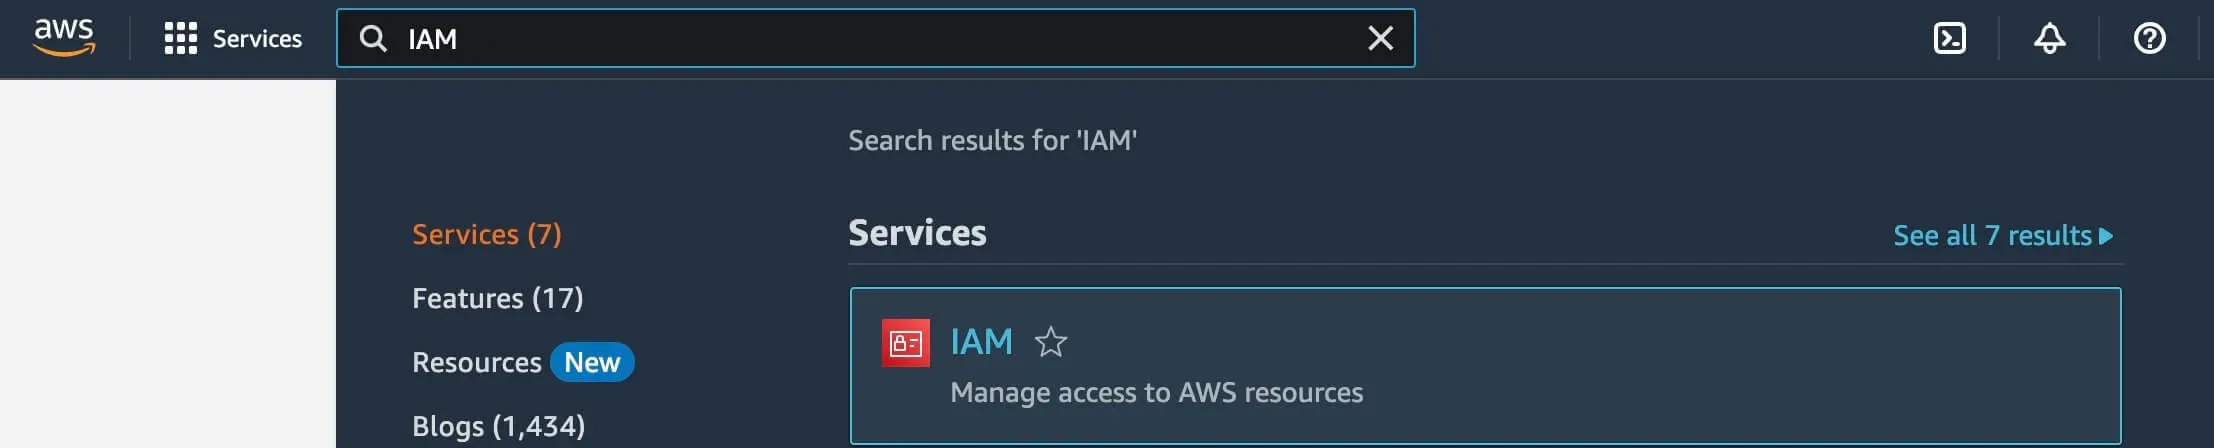
Log in under your root account on AWS and search for “IAM” in the main search bar on top of the AWS dashboard.
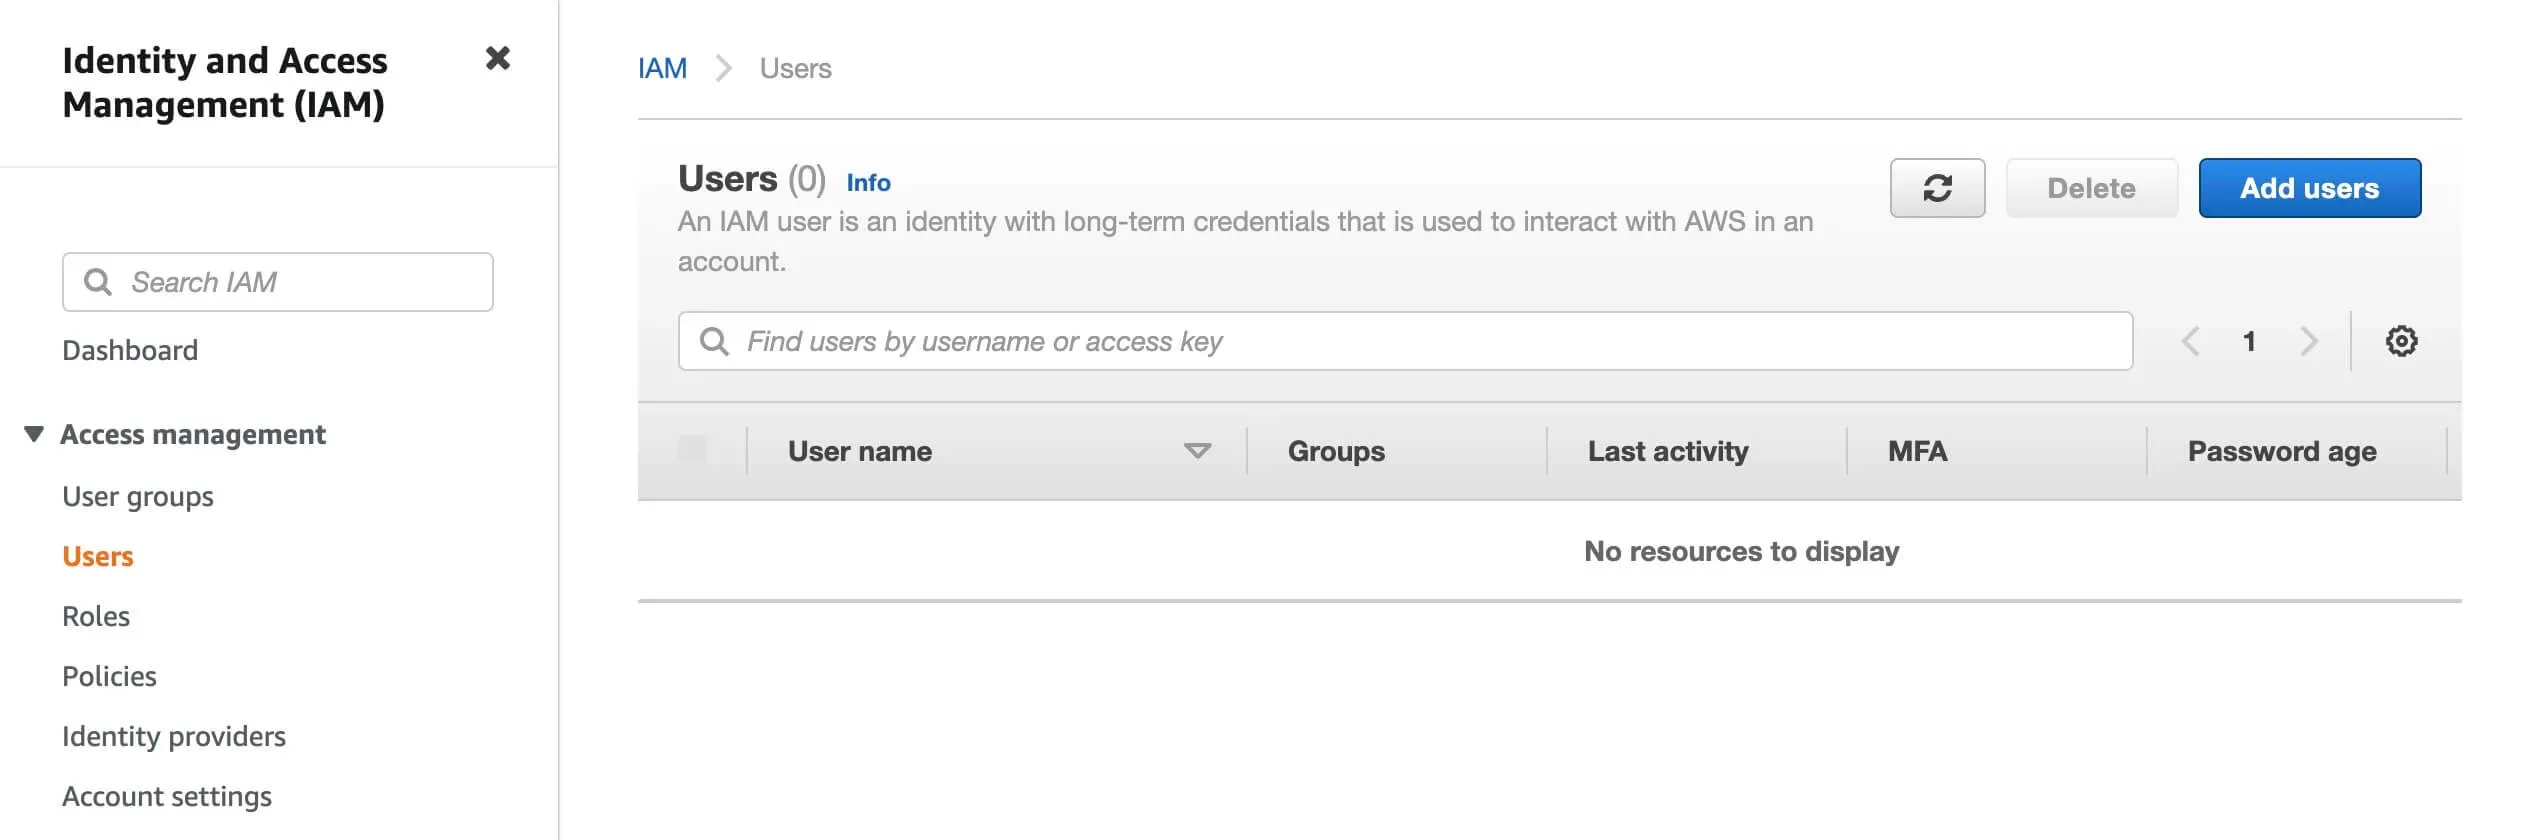
Go to the “Users” section and click on the “Add users” button.
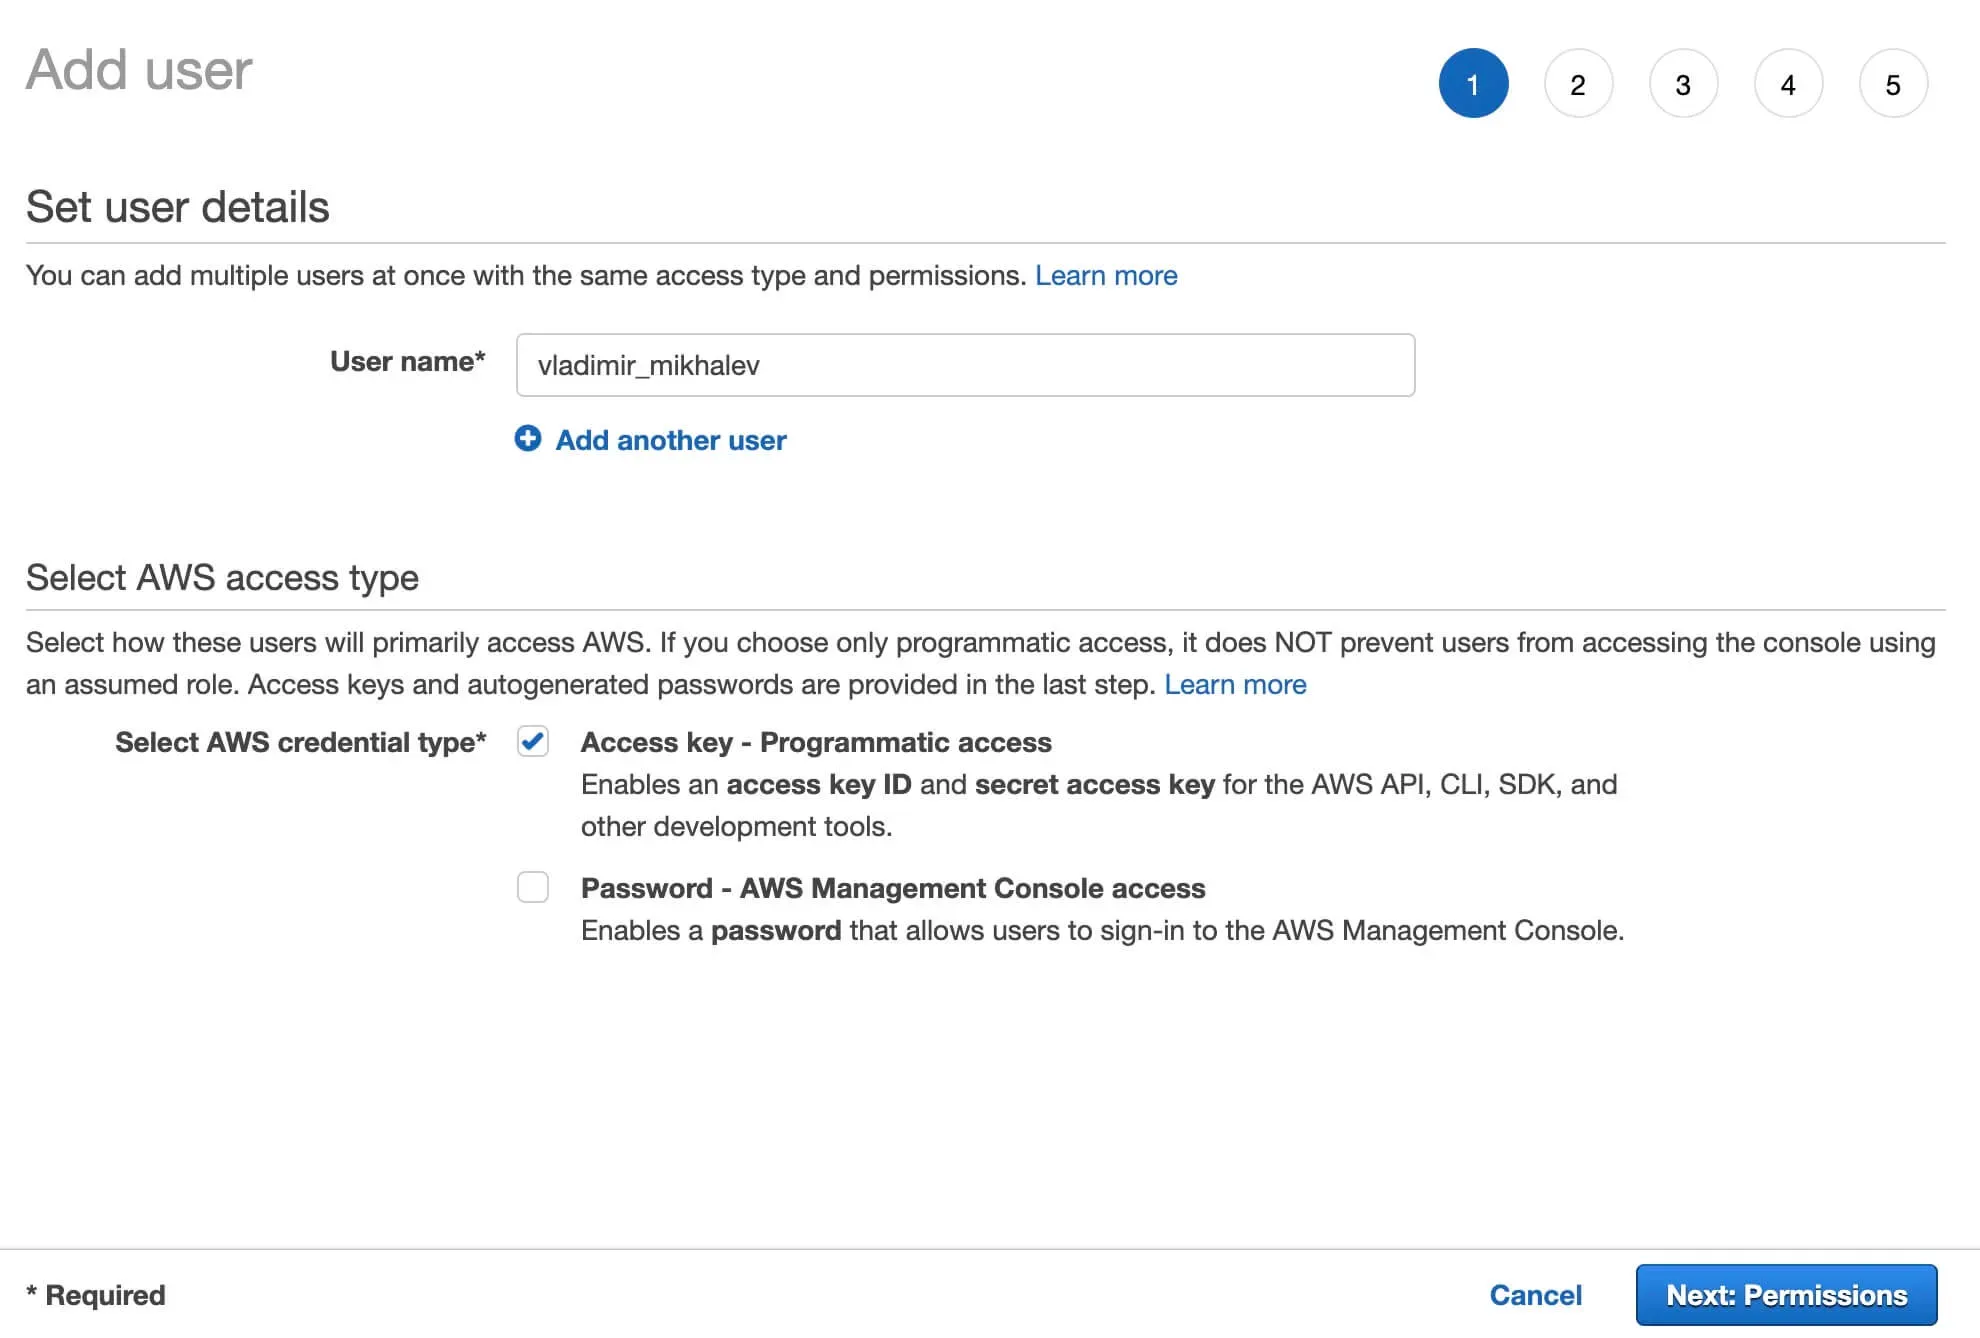
In the “User name” field, specify the username for the new user and check “Access key - Programmatic access”.
NOTEIn this manual, “vladimir_mikhalev” will be used as the username.
Click on the “Next: Permissions” button.
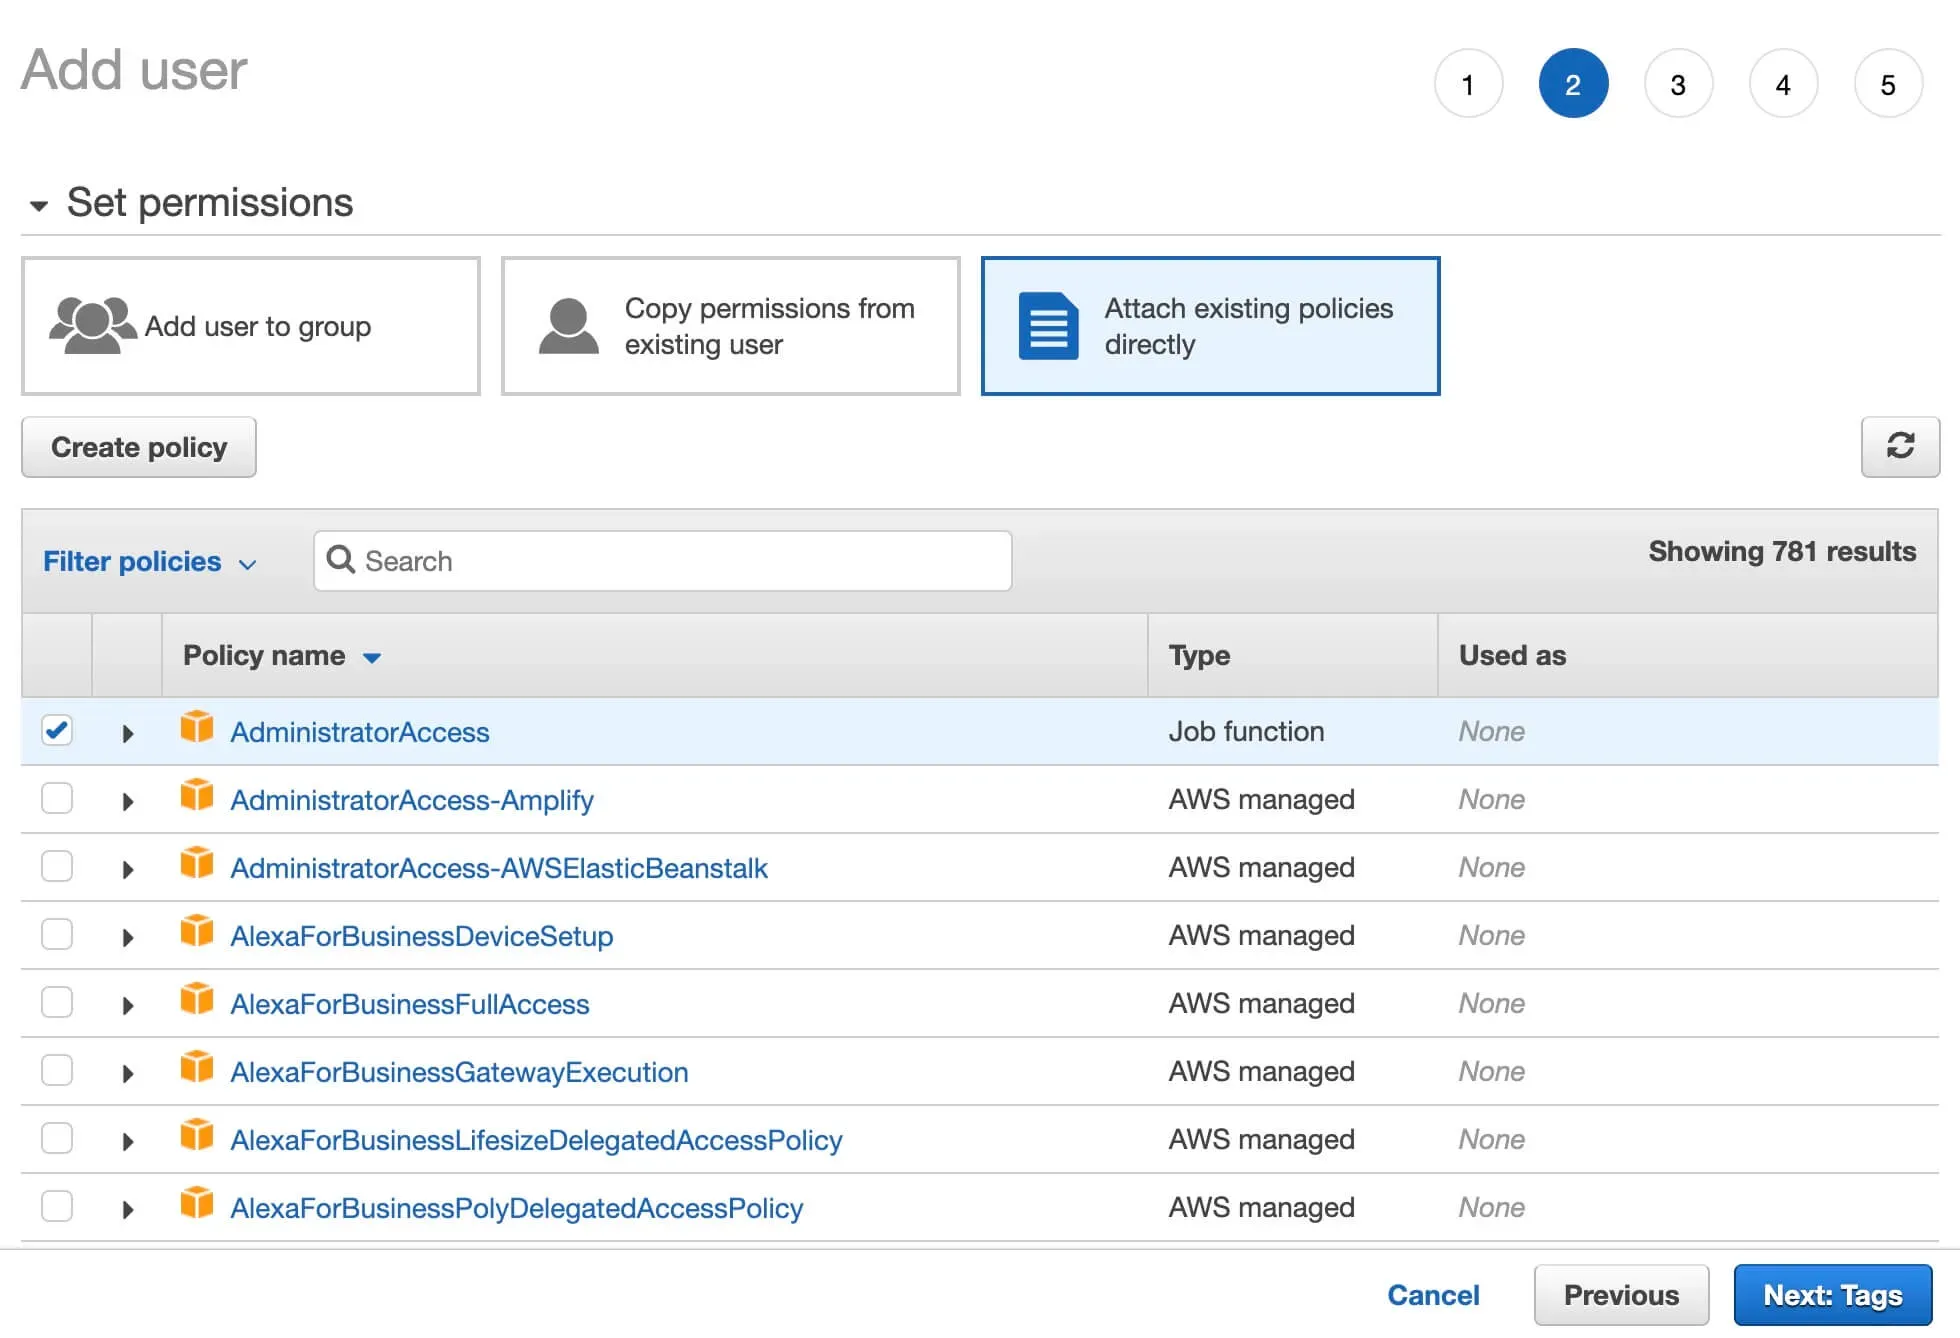
Next, select “Attach existing policies directly”.
Select the “AdministratorAccess” policy and Click on the “Next: Tags” button.
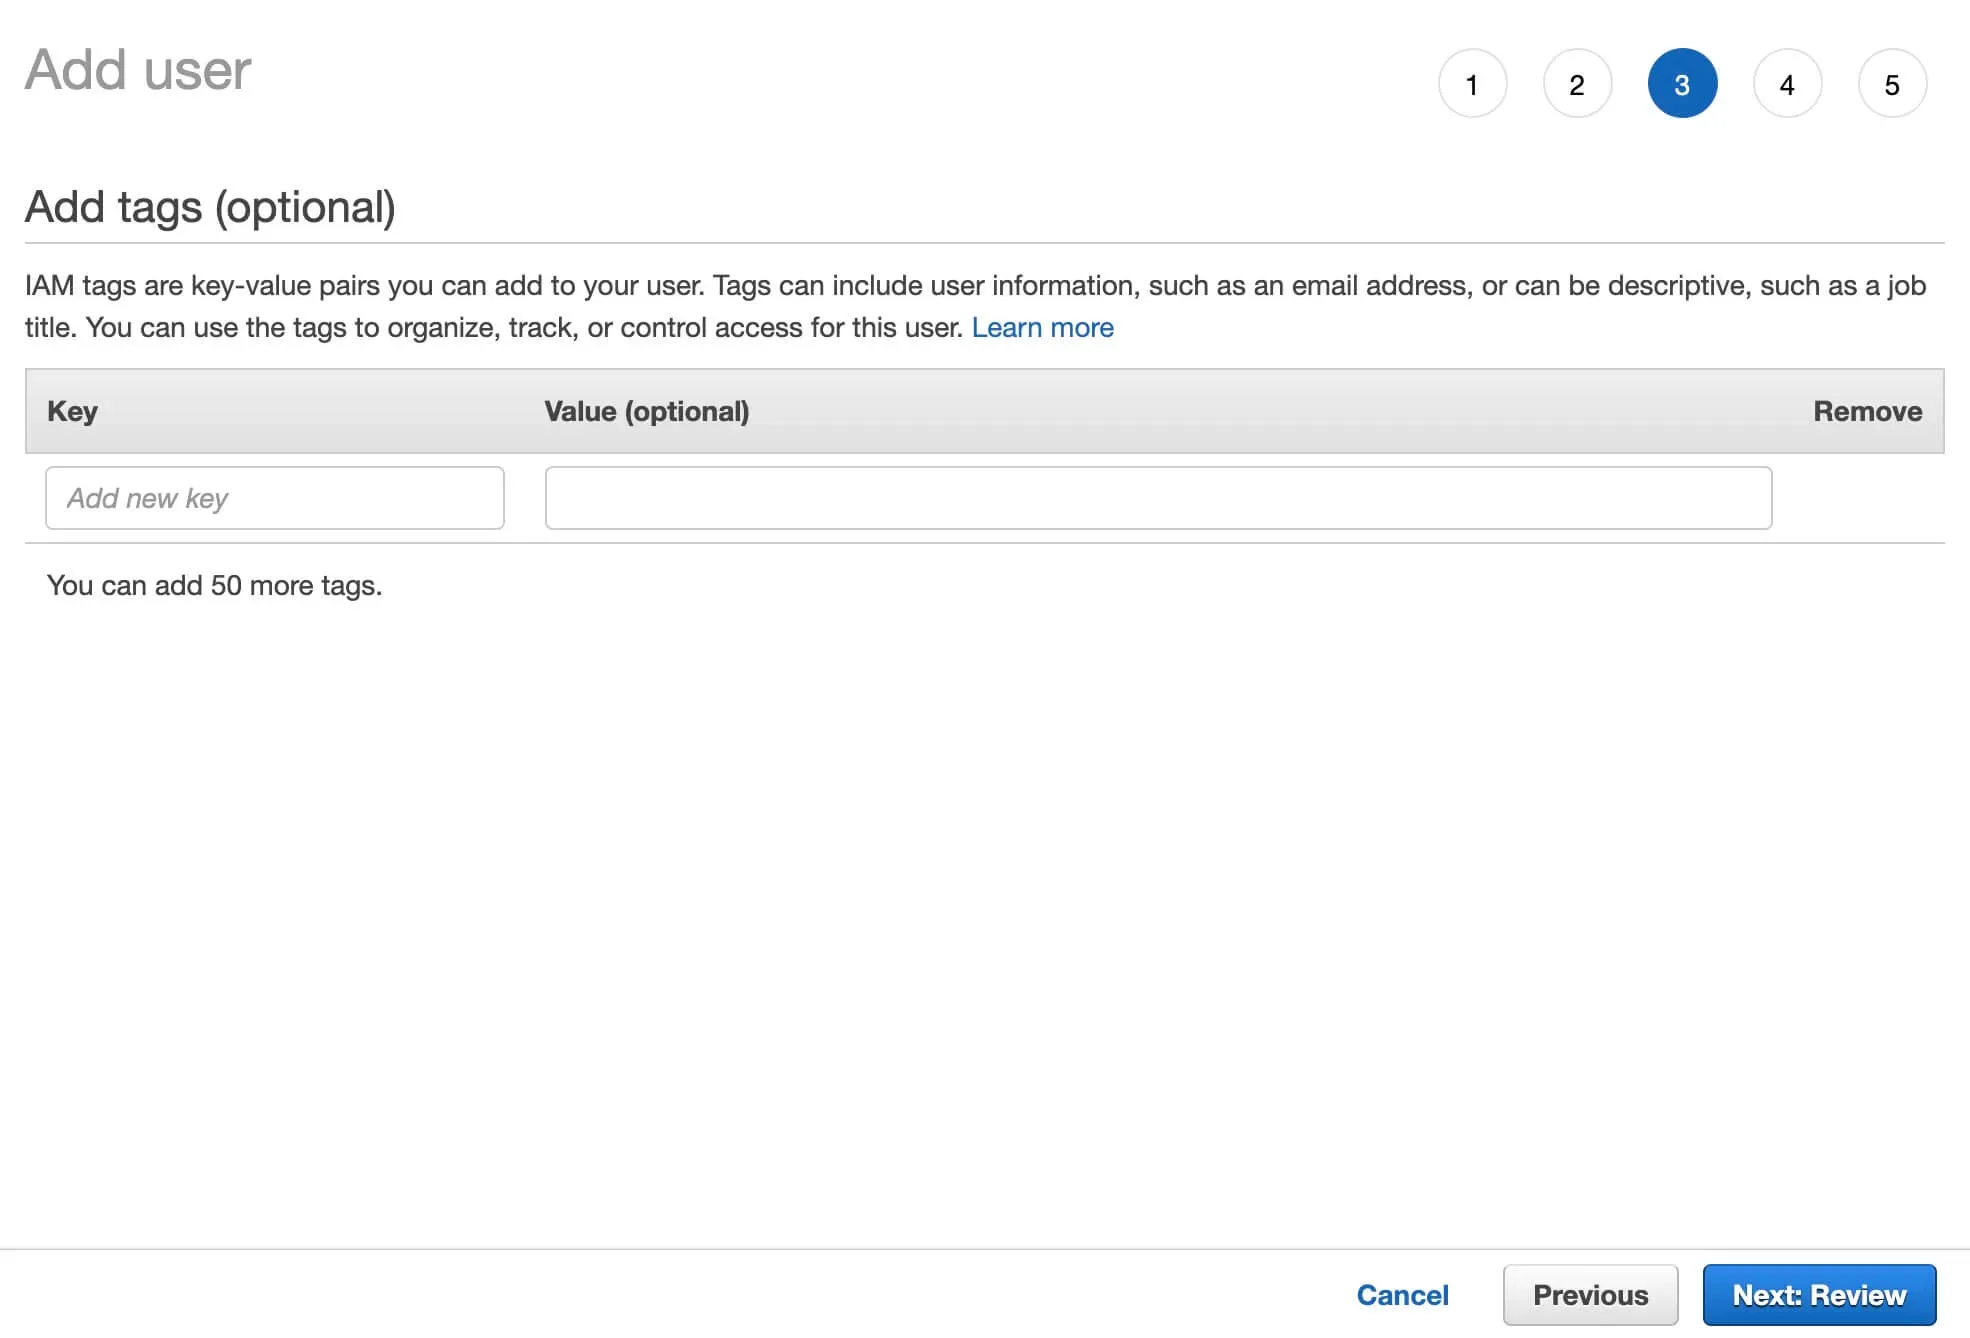
In the next step, you do not have to make any changes.
Click on the “Next: Review” button.
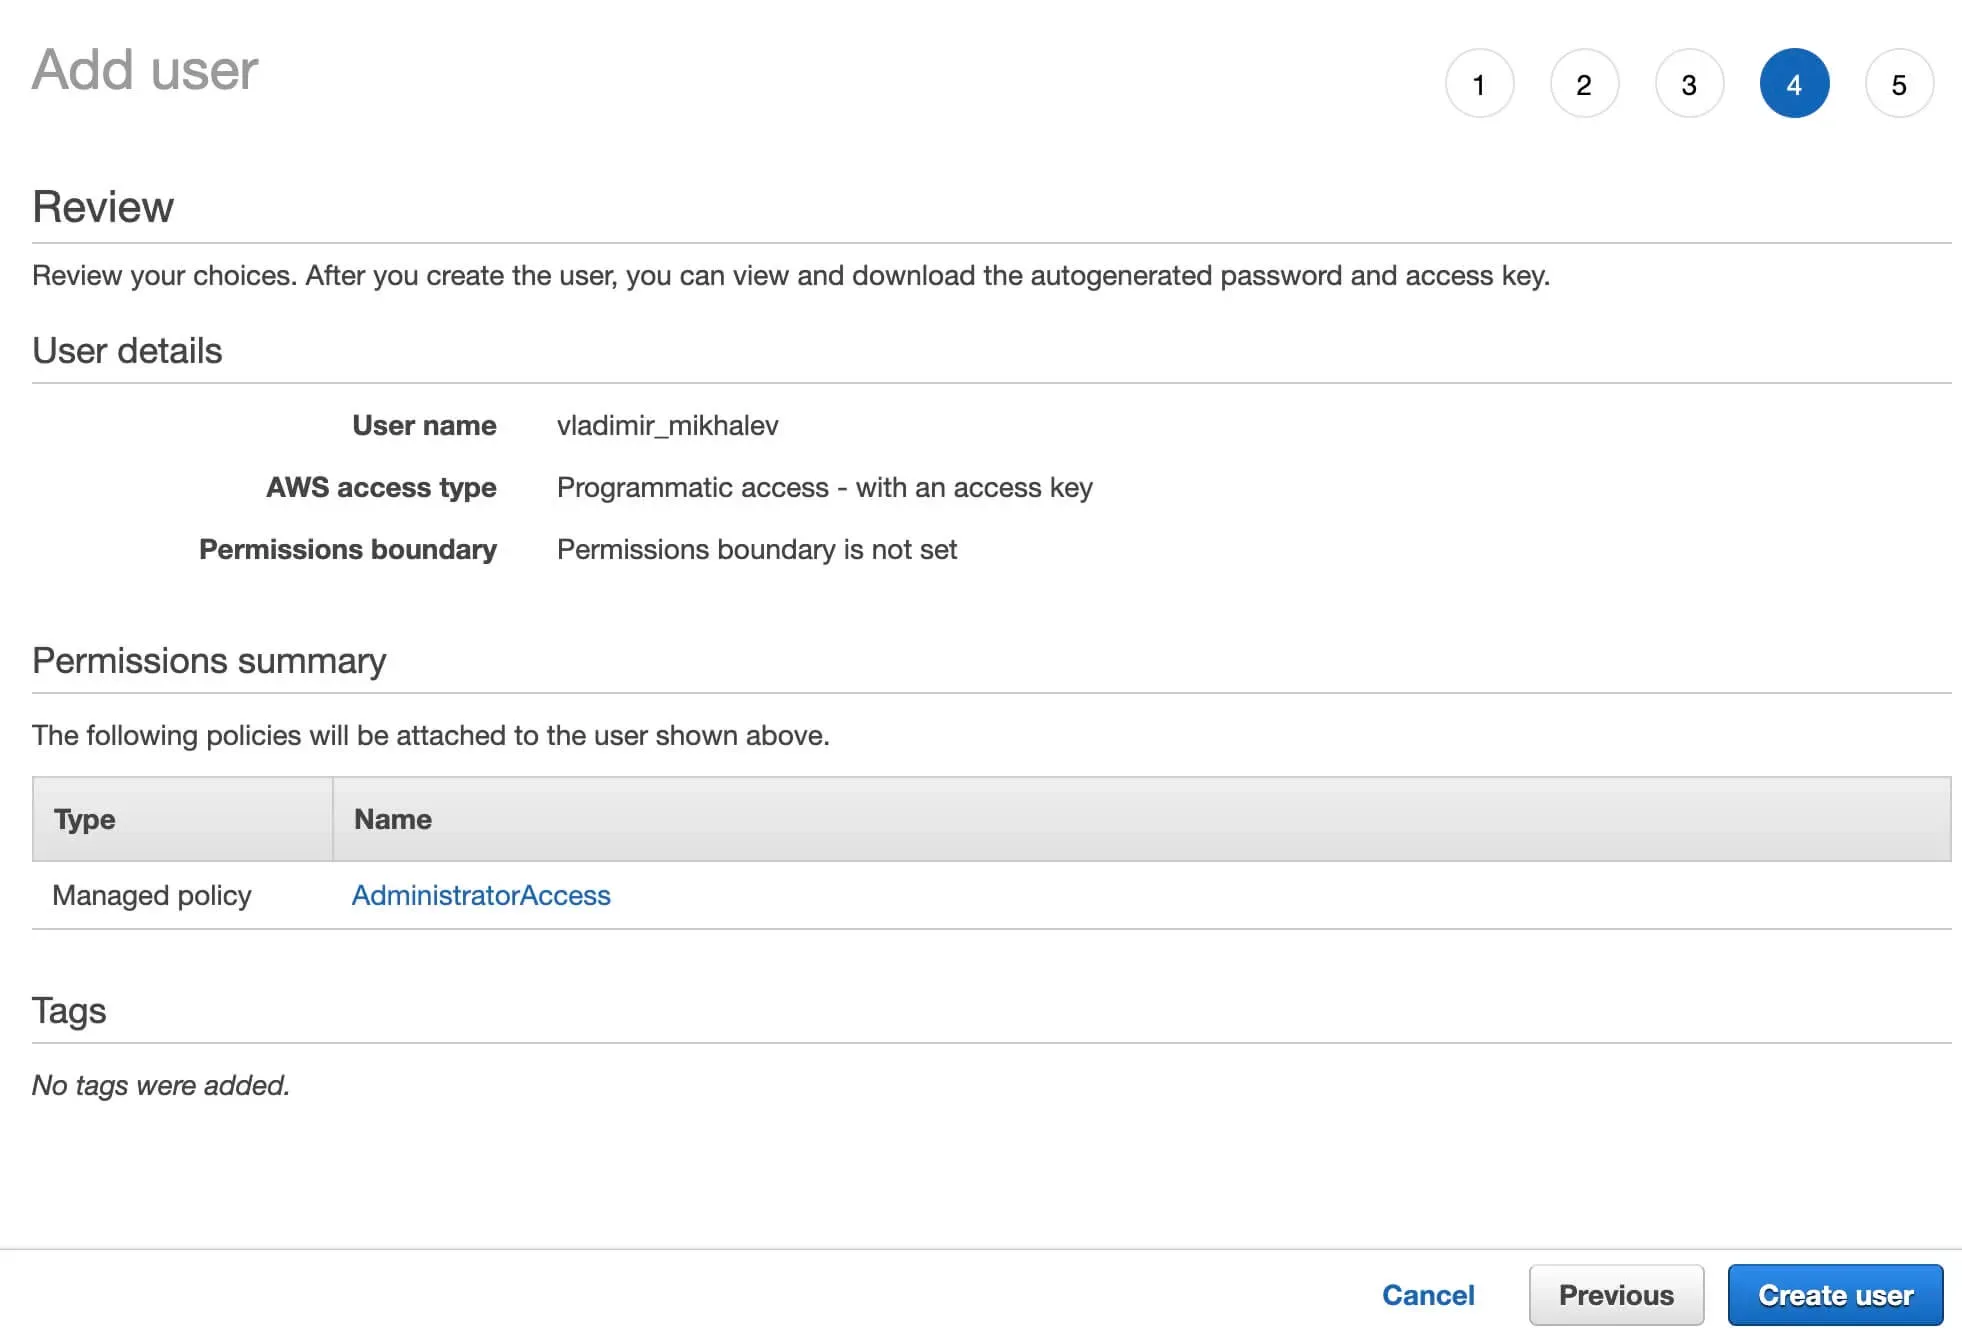
Everything is ready to create a new user.
Click on the “Create user” button.
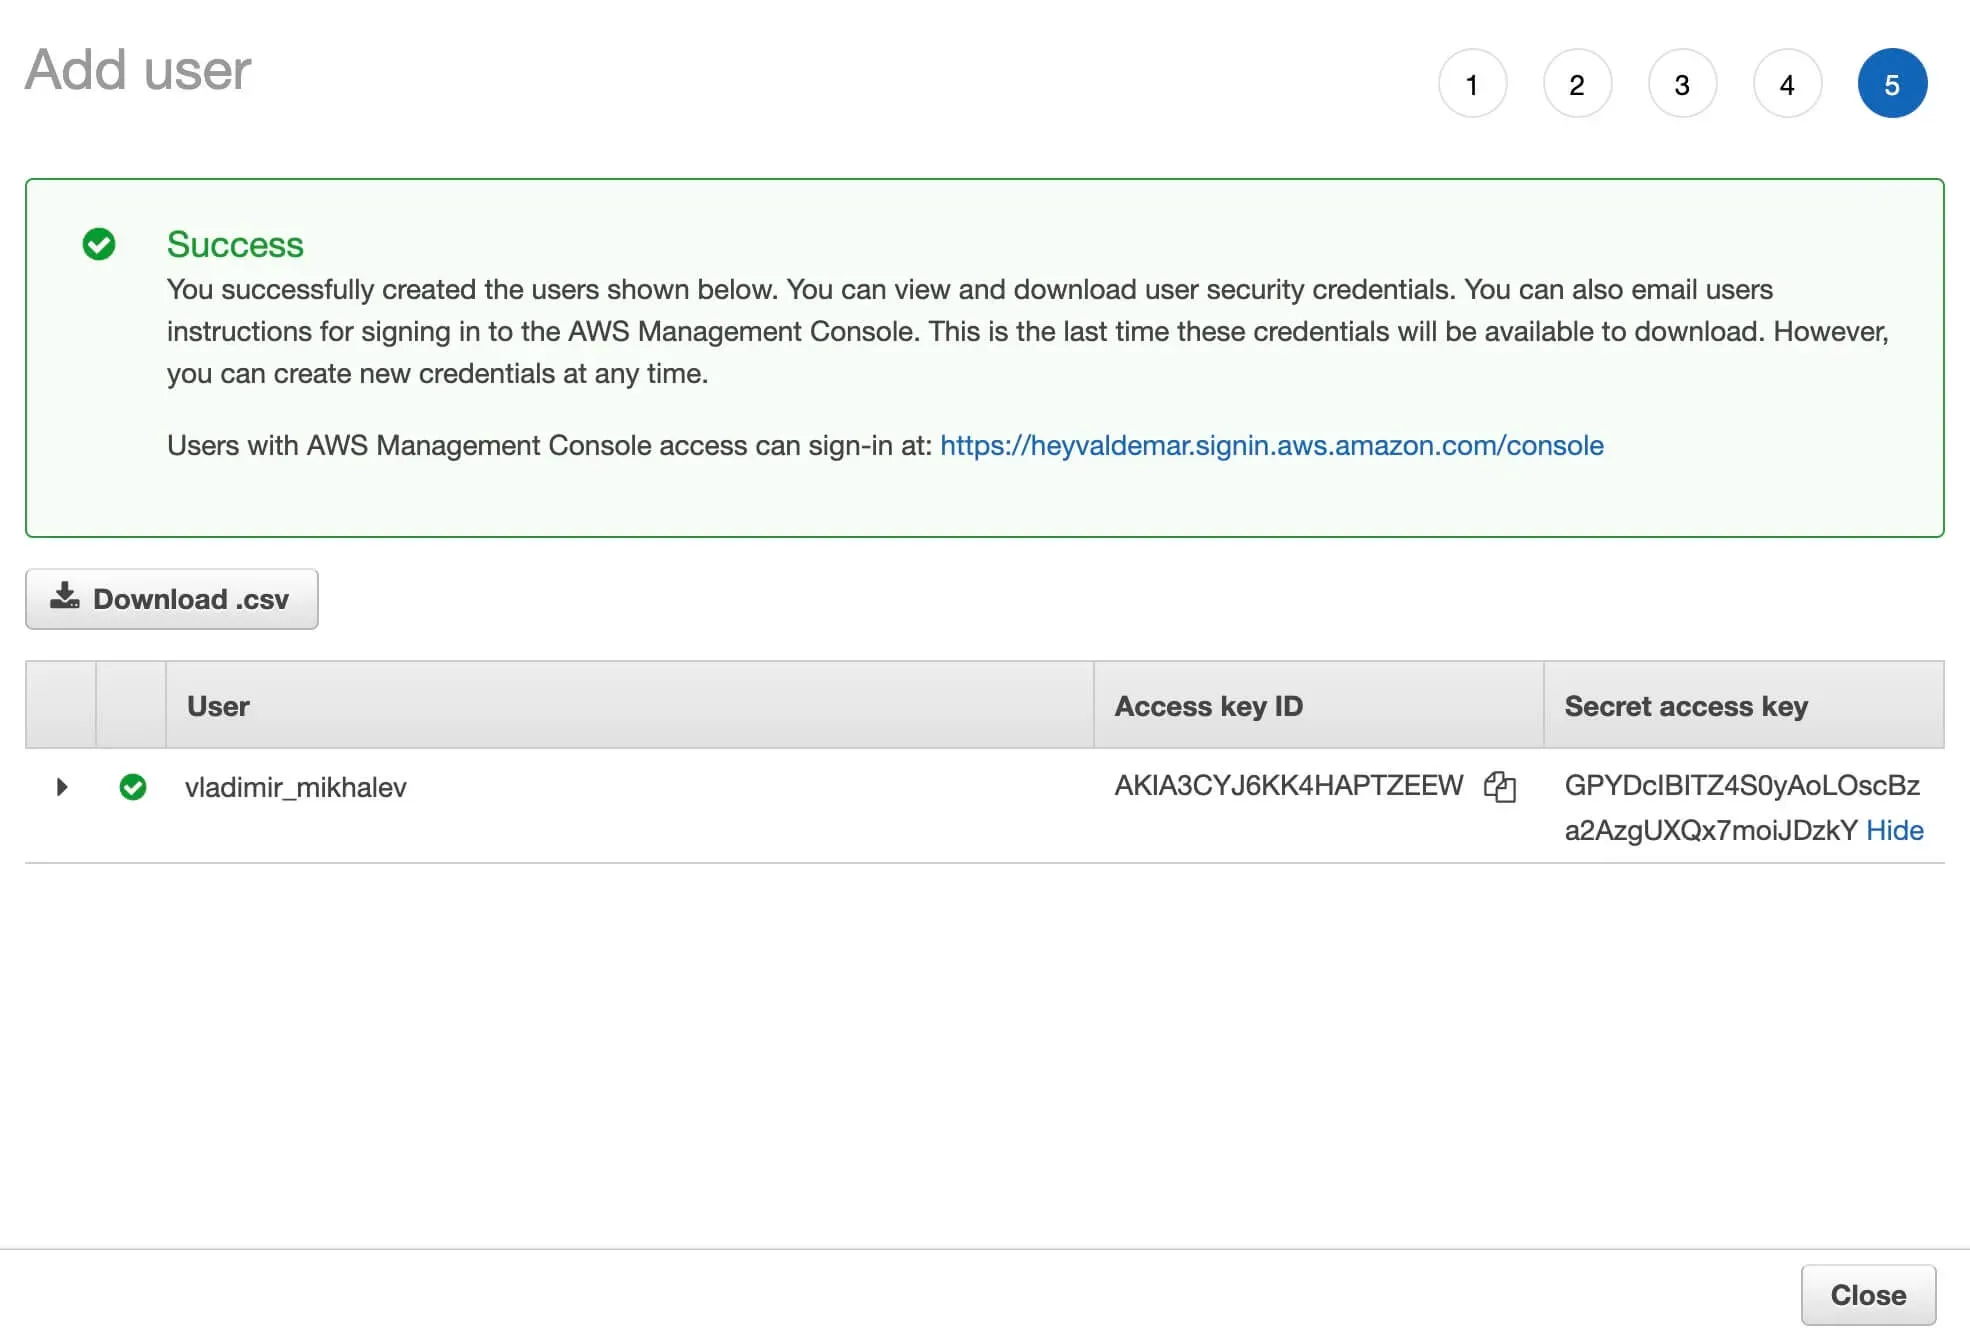
The user has been successfully created and has the necessary permissions.
Now you need to save the received “Access key ID” and “Secret access key”.
Click on the “Show” button to display the contents of the “Secret access key” section and save the contents of the section to a safe place.
Click on the “Close” button.
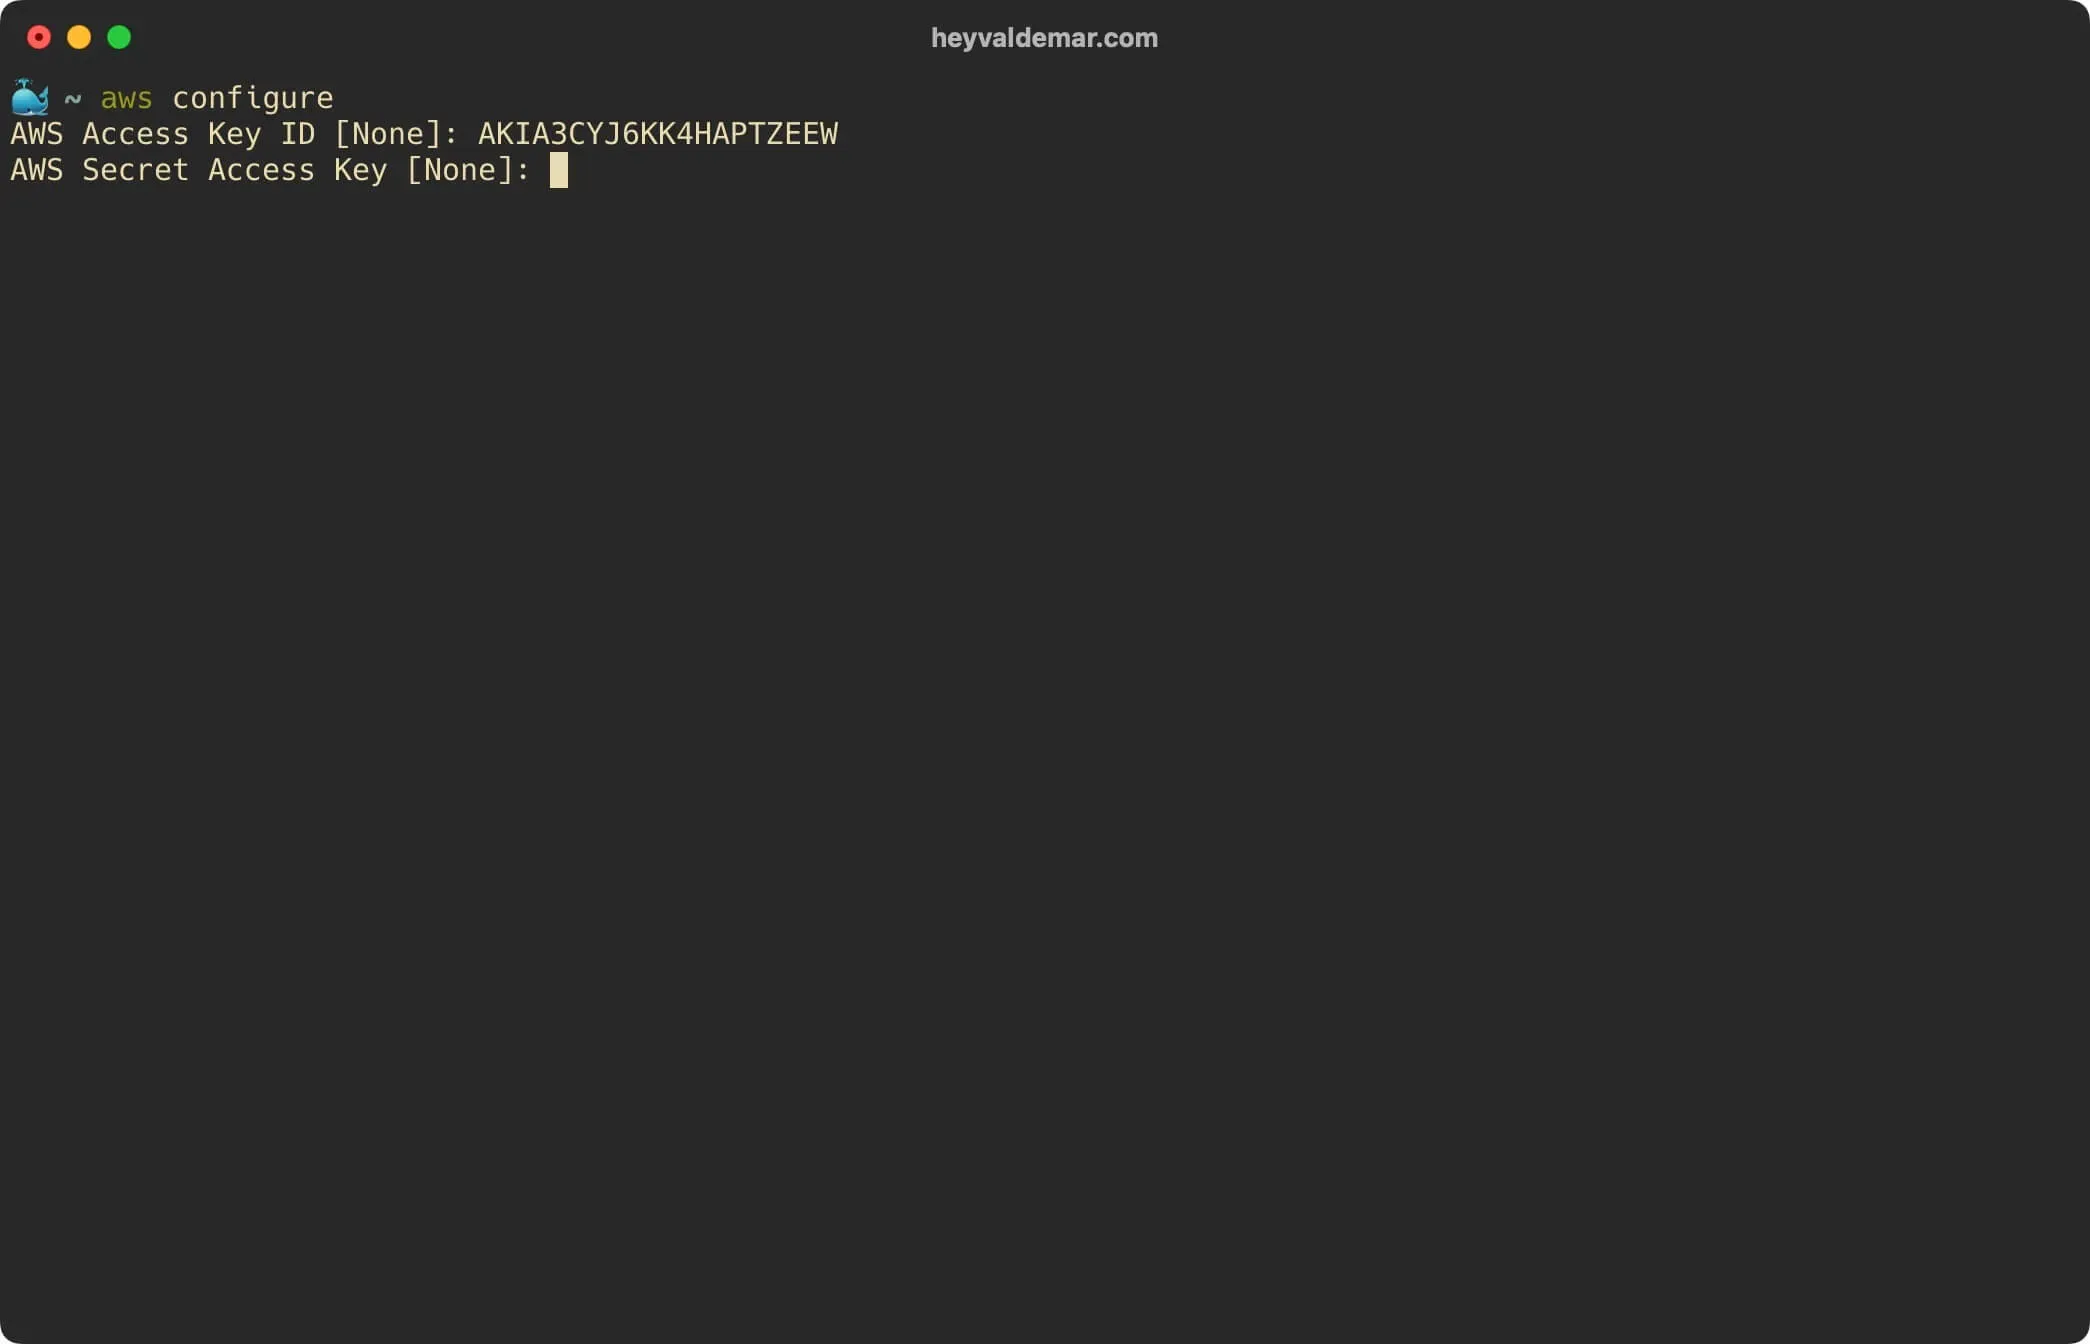
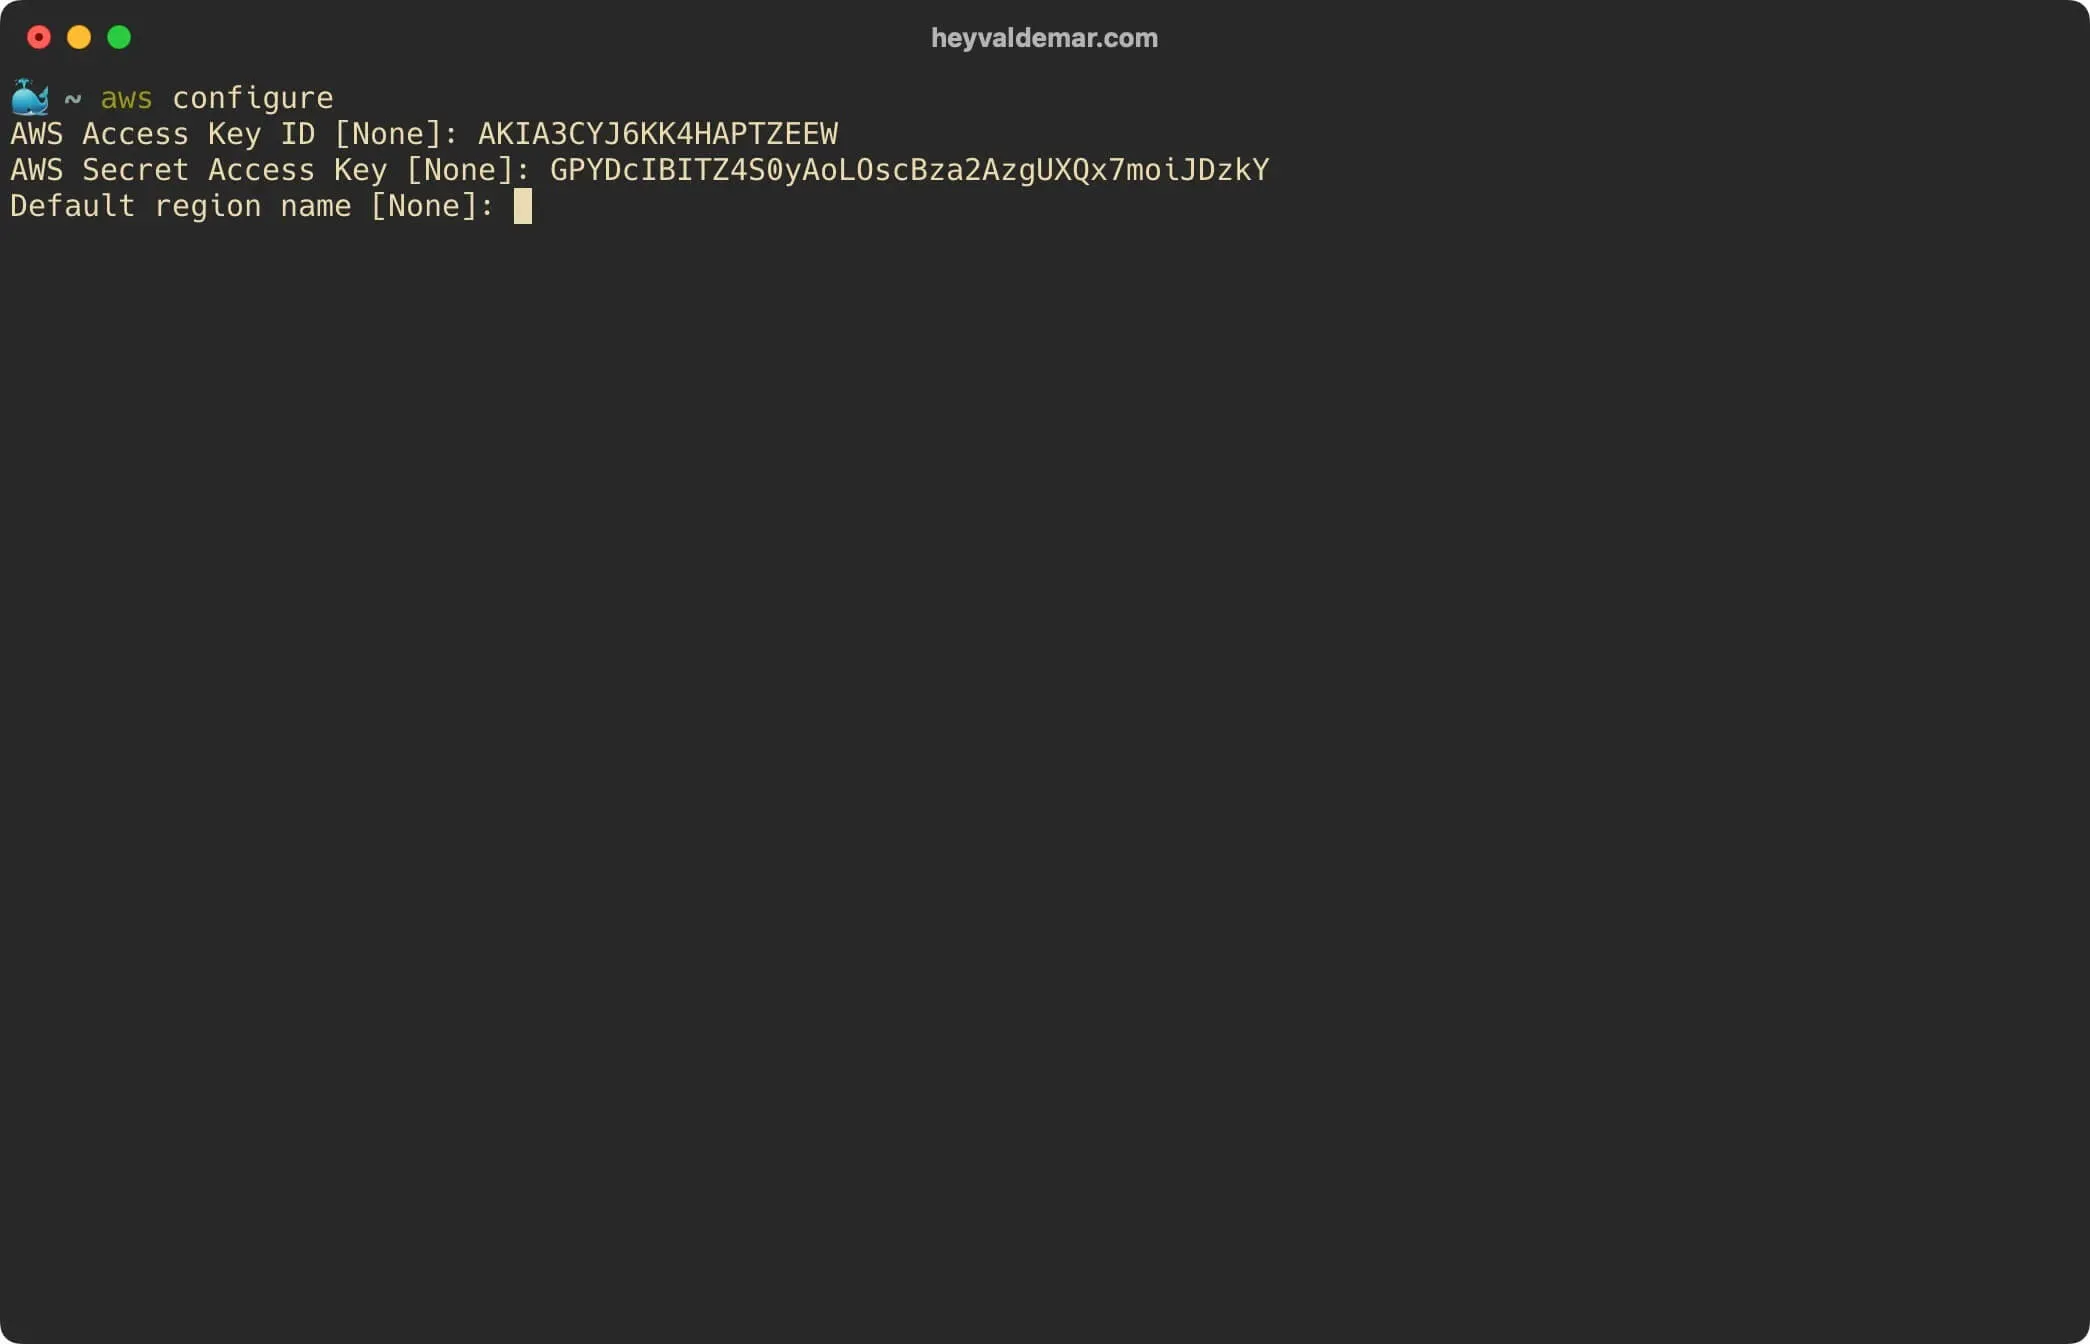
Let’s configure AWS CLI with the command:
aws configure 
In the “AWS Access Key ID” field, specify the access key ID that you obtained earlier during user creation.
Press the “Enter” button.

In the “AWS Secret Access Key” field, specify the secret access key that you obtained earlier during user creation.
Press the “Enter” button.
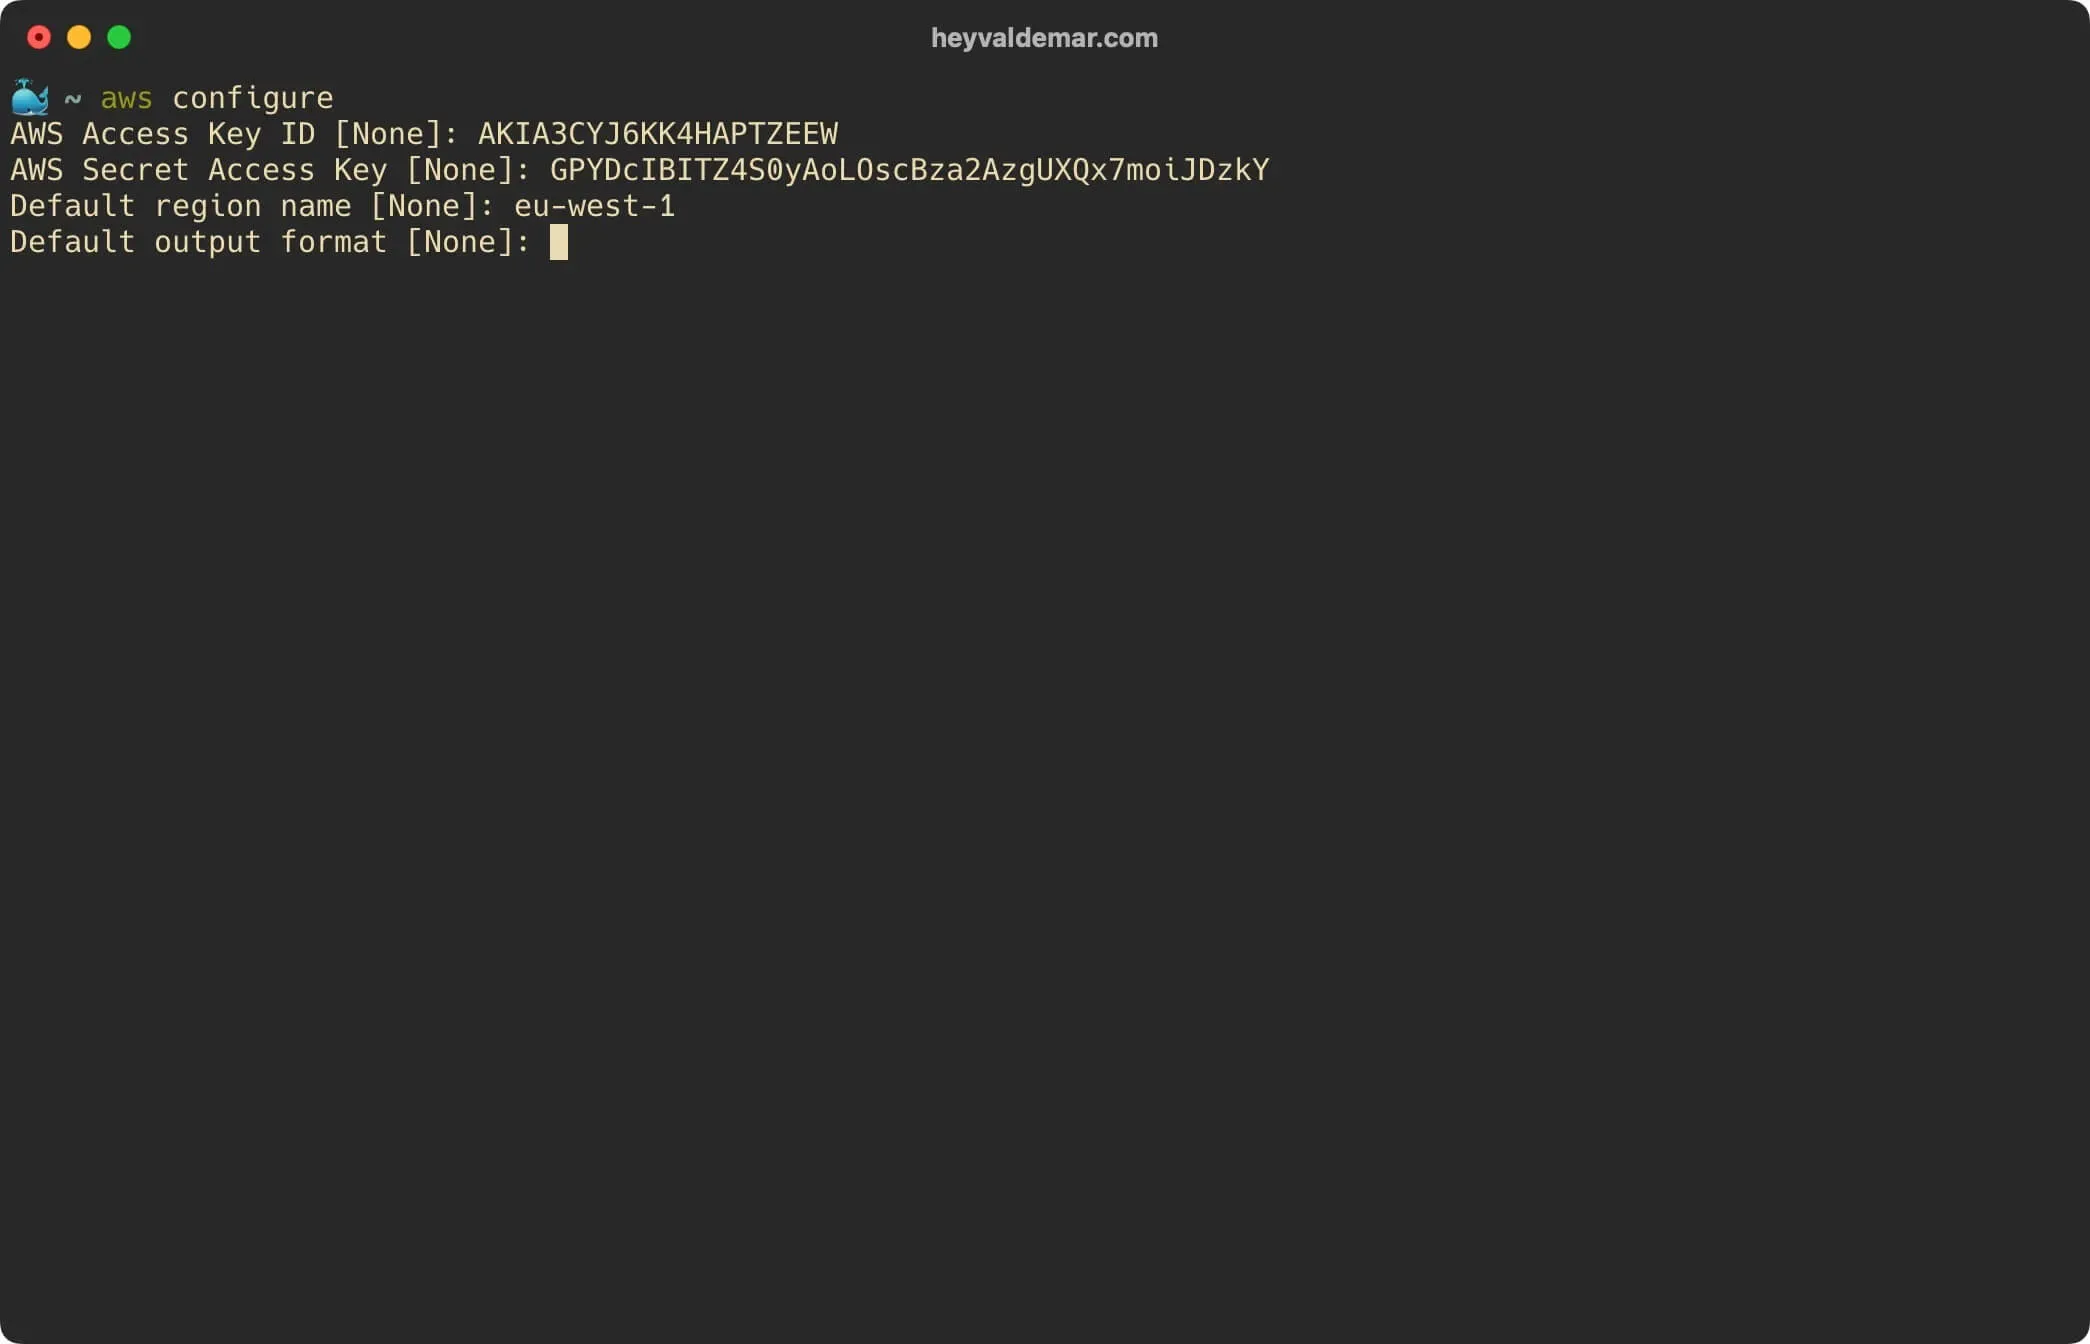
In the “Default region name” field, specify the AWS region in which you are planning to work.
Press the “Enter” button.
In the “Default output format” field, specify “json” as a format.
Press the “Enter” button.
Everything is ready to use the AWS CLI.
Let’s list all EC2 instances with the command:
aws ec2 describe-instances 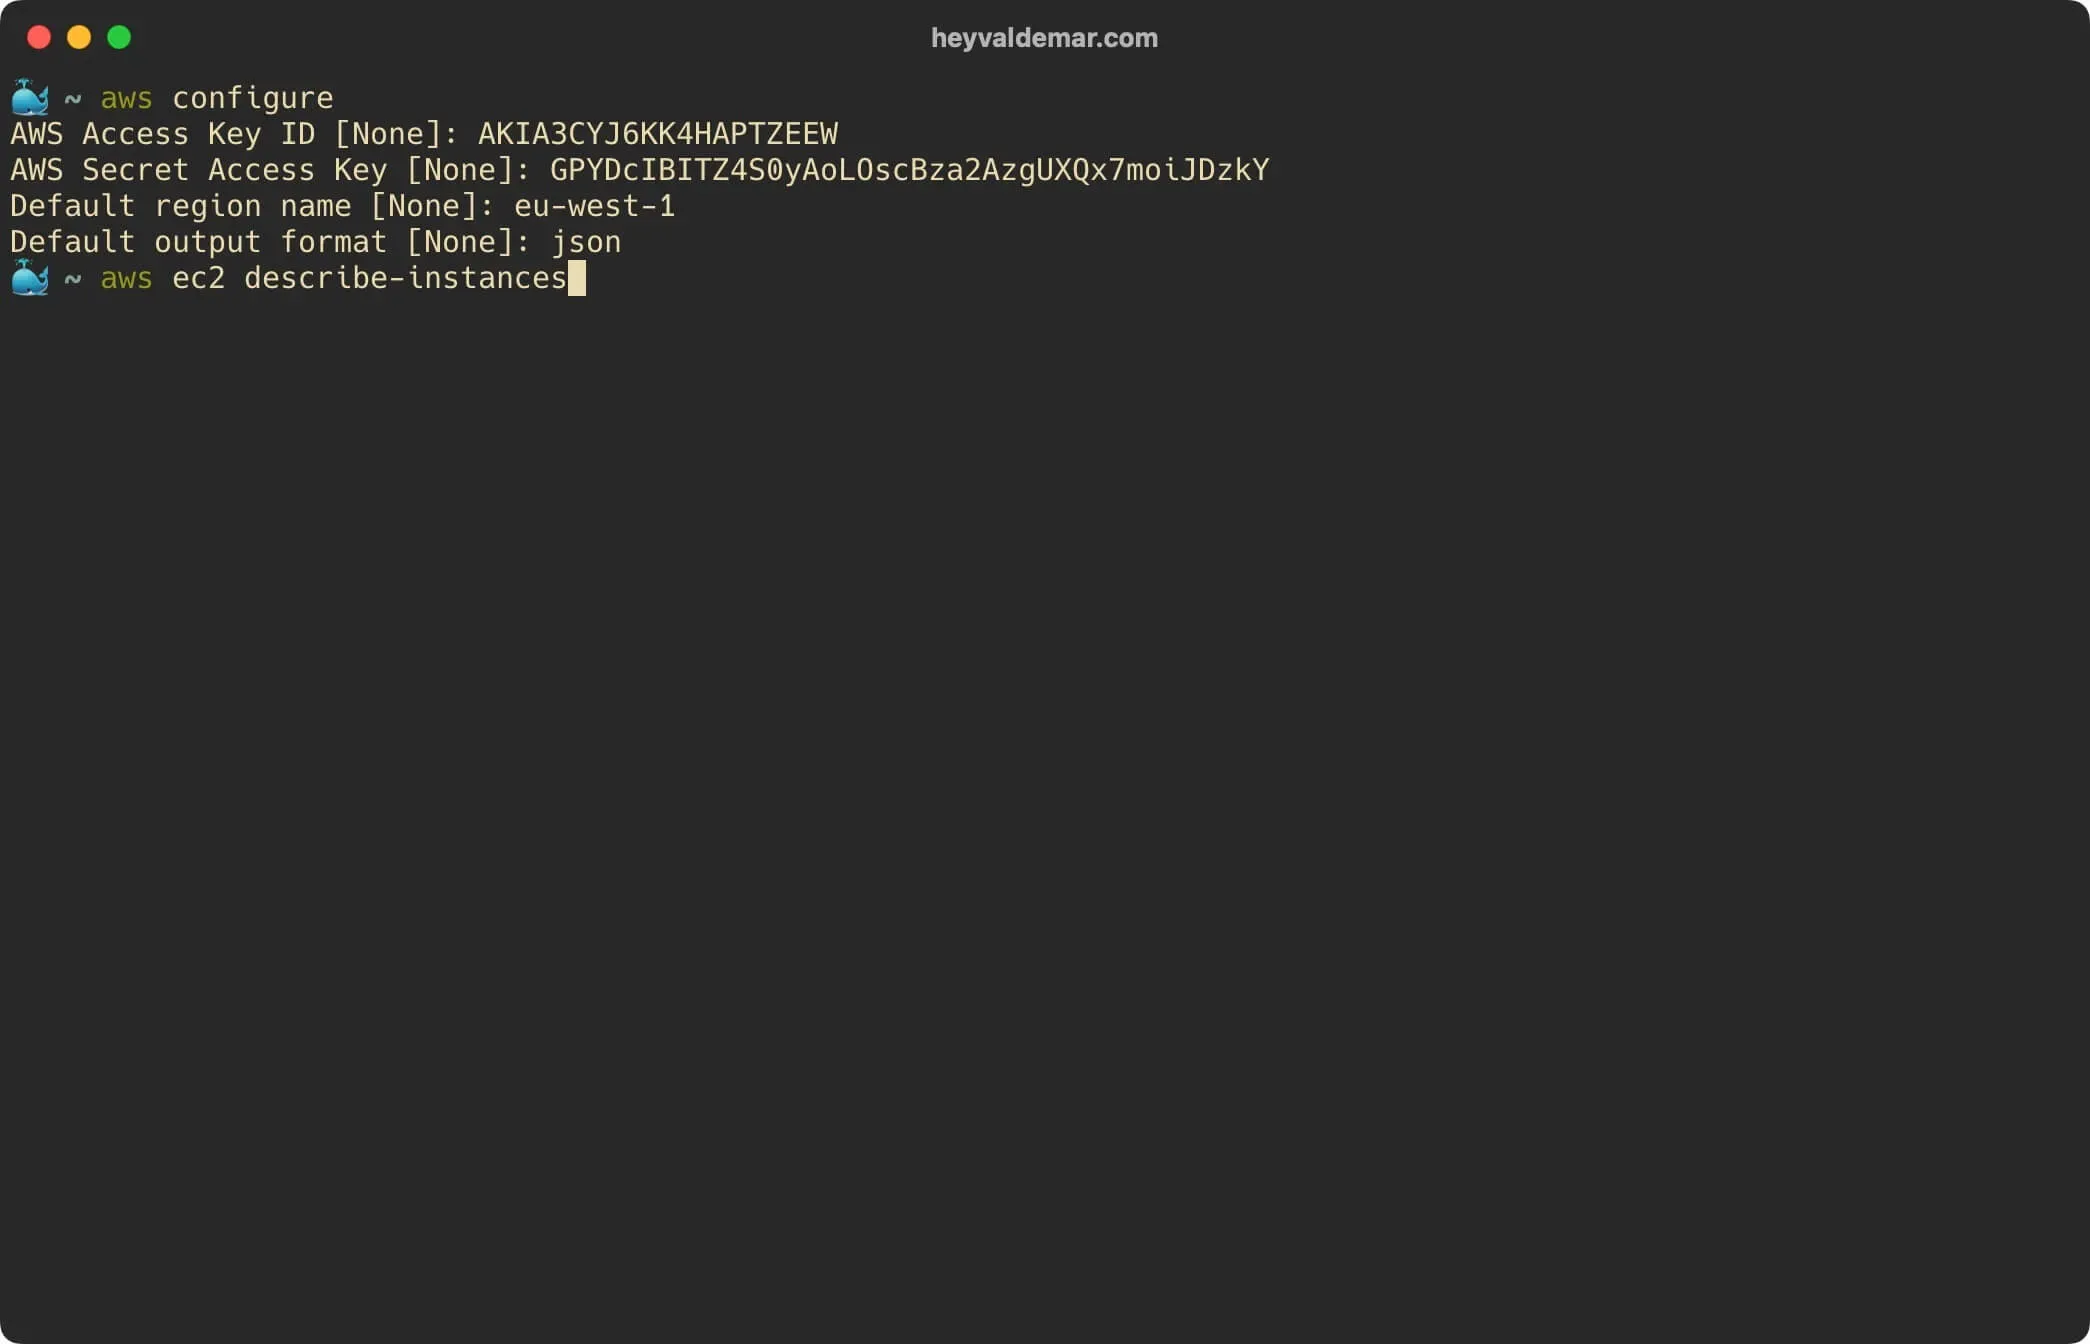
Please note that I have just one EC2 instance.
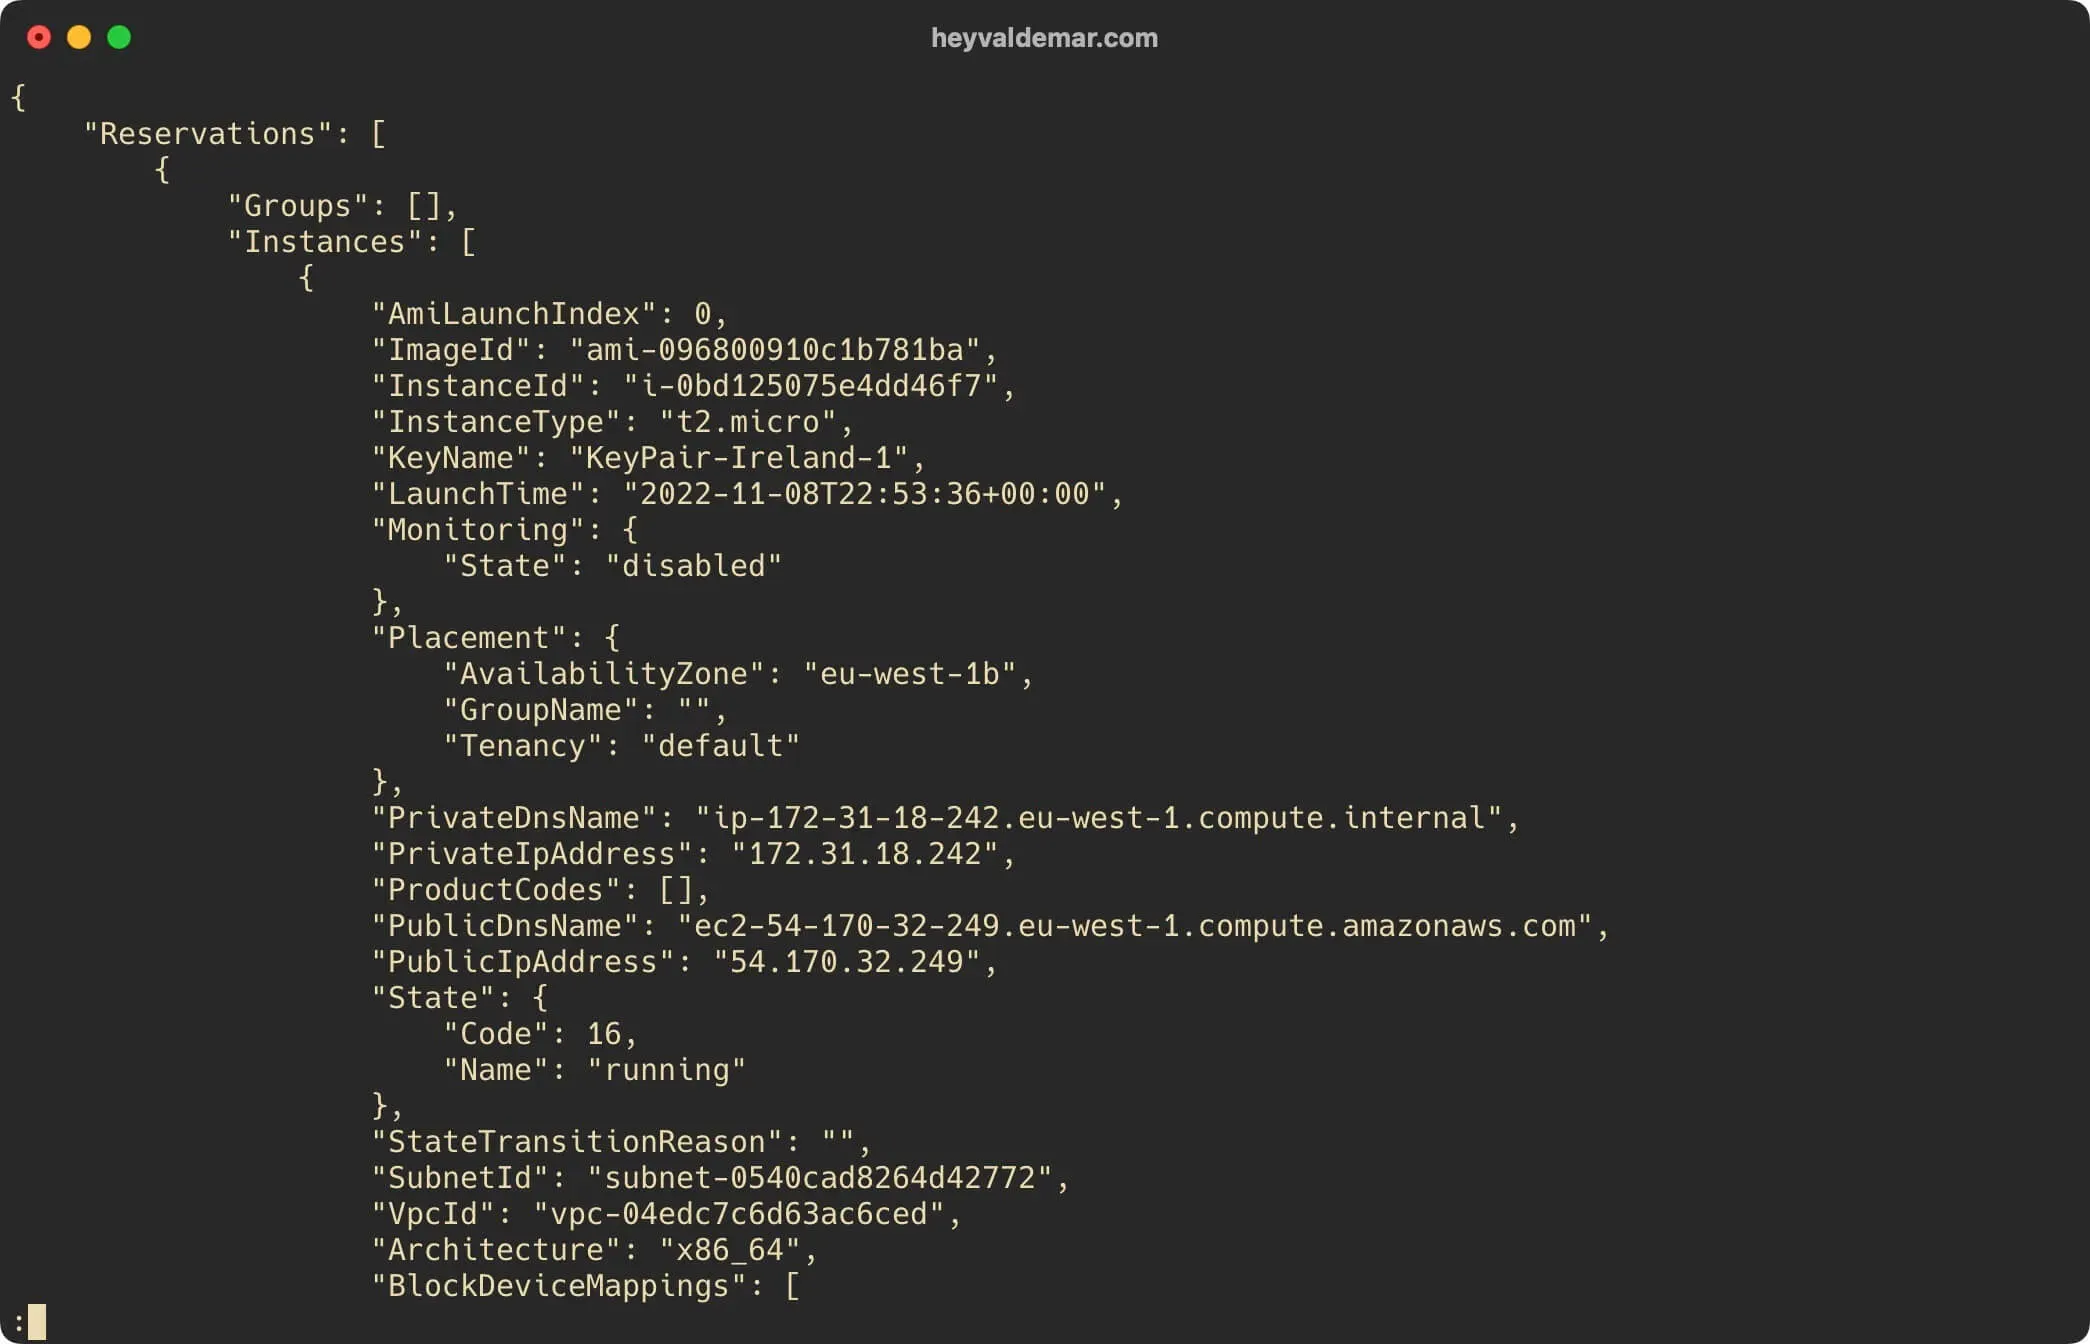
Now press the “q” button to close information about EC2 instances.
For step-by-step instructions on installing eksctl on macOS, see my guide: Install eksctl on macOS.